

![]()
Are you looking for a reliable virtualization package to run multiple virtual machines that handle unmodified Linux or Windows images? Then look no further than your existing Linux configuration. It already has the underpinnings to support Kernel-based Virtual Machine (KVM).

You need look no further than your distro’s package repository to install KVM. This package is a full virtualization solution for Linux on x86 hardware. It includes virtualization extensions (Intel VT or AMD-V) and a loadable kernel module, kvm.ko. This is the core virtualization infrastructure along with a processor-specific module, kvm-intel.ko or kvm-amd.ko.
You will probably need to also install a modified QEMU configured for your distro — but again, if your distro is new enough to include KVM, it should also have a matched QEMU package. Depending on your Linux distro, the actual package name for the built-in virtualization software will be different. In my case, the package is called “Qemu-KVM.”
KVM is a tad bit more troublesome to get working initially. I found it to be more of a hassle than setting up VMware or VirtualBox — but once you have KVM working, it works fairly well.
Rocky Start
I installed KVM on computers running LinuxMint 14 and Ubuntu 12.10 and had similar trouble on both. Neither configuration worked out of the box without some fiddling on my part.
In both cases, I had to install from each distro’s software centers the AQEMU package. This is a Qt4 graphical interface used to manage QEMU and KVM virtual machines. It has a user-friendly interface for setting up the majority of QEMU and KVM options.
On the Ubuntu computer, the QEMU-KVM package was preinstalled. On the Linux Mint computer, the packages were waiting for installation in the Mint repository. The AQEMU settings were balky in both cases, but both accepted the options I entered after some trial and error.
Once the settings were fixed in AQEMU, the interface worked from the menu to create a new Virtual Machine or start an existing one in Ubuntu, but in Mint AQEMU failed to start. That left me with the command line interface (CLI) from within a terminal window.
Black Box Boogie
Another disheartening point is actually starting the VM environment. Only AQEMU shows up in the application menu. You must open a terminal box and issue the appropriate commands — unless, of course, your system actually lets you use the qt4 GUI in AQEMU.
Virtual Machines by design run in their own isolated environment. Whether it’s an application window from running AQEMU or terminal box from the CLI, either way the KVM infrastructure gives each virtual machine its own private virtualized hardware. This includes a network card, disk, graphics adapter, etc.
Like playing in a sandbox, KVM runs whatever OS you load in its own isolated world within the host computer’s own operating system. The virtual machine will share available system memory with host OS, depending on the amount of total installed RAM (Random Access Memory) on the host computer. You can adjust the memory usage settings in AQEMU’s configuration options.
Getting Started
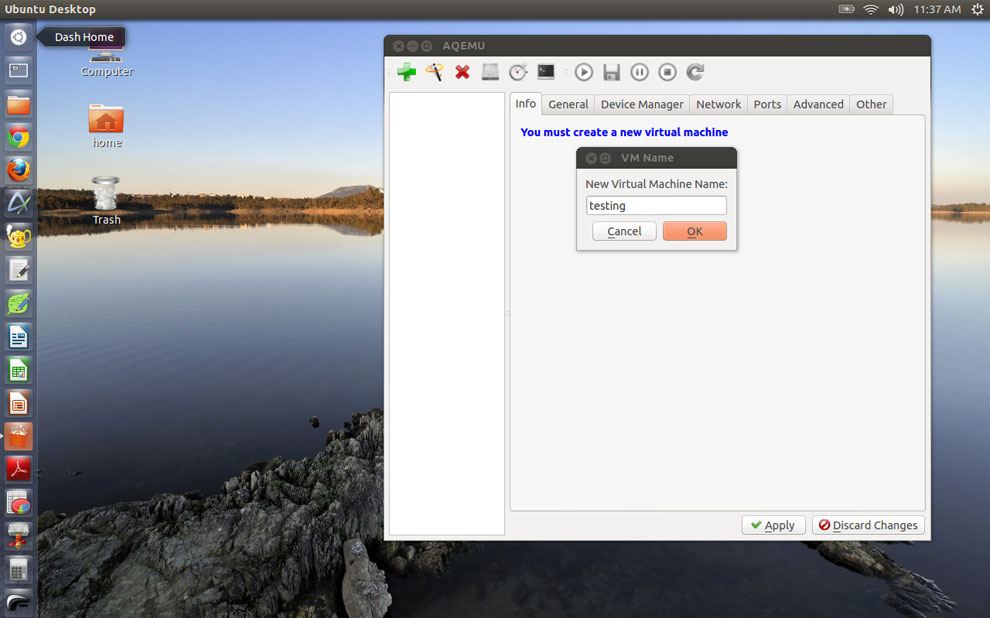
If the front-end provided by AQEMU works on your computer, start a new virtual machine from its menu. Or you can select an existing VM already configured.
Starting it is as simple as pressing the familiar “play” icon in the tool bar. Either way, the KVM process will access the directed ISO location and begin to load it into its own window on the desktop.
Starting the virtual machine process from the terminal window is a bit less convenient. You can check the KVM home page for more detailed documentation. Or for more information on using the KVM command, type “kvm –help” or “man kvm.”
CLI Kick Start
Essentially, using the terminal box method, you start KVM and add the location of the ISO file you want loaded. The settings can become slightly complicated. What worked for me was this simple command string:
[] kvm /dev/cdrom
Two other options, depending on your computer’s configuration and the location of the ISO file, can set the amount of memory to assign the virtual machine. Try or modify these command strings:
[] kvm -m 512 -hda disk.img -cdrom linux.iso -boot d -smp 2
[] kvm -m 512 -hda disk.img -boot c -smp 2
The first command starts KVM with 512 MB memory, using the file “disk.img” in the current directory as the first hard drive, the file “linux.iso” in the current directory as the CD-ROM, booting from the CD-ROM disc and providing two processors to the virtual machine.
The second command (use one or the other) starts KVM with the same memory allocation from the same file name, but the ISO file is located on the hard drive.
Running It
Unless you store the ISO files you regularly use on the host computer’s hard drive, starting the VM process takes from three-to-five minutes. Obviously, optical drives transfer data much more slowly than do hard drives or network connections.
If you have waited for a live session of a Linux distro to load from a CD or a DVD, expect the process to take a few minutes longer when going into the virtual machine.
Once the guest OS is up and running, it performs reasonably well in the KVM virtual environment. I had no trouble using any of the OS functions under the guest mode. I also felt little or no operational difference in the performance of the host OS. Credit for that, I admit, may be largely due to the ample supply of RAM that both host computers have available.
What You Need
While the KVN infrastructure is built into the Linux OS, you need a modern version of the Linux kernel to use this virtual machine. KVM requires machine extensions. The kernel component of KVM is included in mainline Linux as of version 2.6.20.
You can check for these extensions by running the command “. egrep ‘^flags.*(vmx|svm)’ /proc/cpuinfo” in the terminal on a recent Linux kernel. If the command returns any output, your CPU has support.
Even if your Linux distro has the stuff inside, your hardware configuration might not be cooperating. Intel VT or AMD-V support could be disabled by default in your computer’s BIOS. So check your BIOS for an appropriate setting to make sure that your CPU is configured to support the Linux hypervisor or HVM.
Bottom Line
Some motherboard manufacturers disable HVM in the BIOS and do not provide a switch for you to enable it manually. In that case, KVM will not work. Your only option is to try one of the other virtual machine products available.
However, if your computer supports KVM and you succeed in getting it configured properly, you can put virtualization to good use. KVM could be easier to configure, though. This is an area that the Linux community needs to address. Nothing gives Linux a black eye more easily than a built-in product that fails to deliver out of the box.


I have to say that your failure (or discomfort/inability) of using the command line is no reason why this software should be only "halfway there".
KVM is very high quality virtualization that is exceptionally fast and stable, and can be used without complicated kernel patching like xen.
Though you apparently found this unacceptable, it functions pretty darn well from the command line, or can be used with a GUI front end (as you did). But as others have already mentioned, you were using an inferior front end. So I think in reality, you are rating this AQEMU rather than QEMU/KVM.
This article is very, very misleading. I am sorry you were challenged by this software… it sounds like you would be a perfect candidate for sticking with Virtualbox.
I agree with others… why wouldn’t you use virt-manager to manage the virtual machines?? I’d not tried aqemu so I just installed it and the first thing that happened to me when I launched it was a seg-fault. So I uninstalled it.
If you want to use KVM, Virt-Manager has always worked for me.
$ sudo apt-get install virt-manager
Why not simply use "libvirt" with virt-manager ???
It a lot more mature, stable and complete.
???
The title of this story is very misleading. KVM for doing personal desktop virtualization may be half way there but that’s not what the title says. KVM for professional virtualization stacks up quite well next to VMware, XenServer, Hyper-V, or RHEV..for instance on Proxmox. The title should have made clear that virtualization using KVM on certain linux distributions isn’t the best when desired for use at personal virtualization.