As we explained in our earlier step-by-step guide, if you or your provider have noticed unusual activity on your Linux server, there are some simple ways to tell if your data has been compromised.
Once you're sure a hack is taking place, it's time to carry out damage control. In this guide, we’ll cover some basic steps to take in the wake of a hack, including isolating your server from the network and making a copy of drives so you can have professionals investigate the nature and extent of the breach.
You'll also learn some best practices for restoring your server from a clean backup, scanning for malware, enforcing new password changes, and implementing changes to prevent future attacks.
Step 1. Isolate the Compromised Server From the Network
Should you suspect unauthorized access or compromise of your Linux server, the first step is to isolate it from the network, which will disconnect any unauthorized users. If malware has infected the server, isolating it will also stop the infection from spreading across the network.
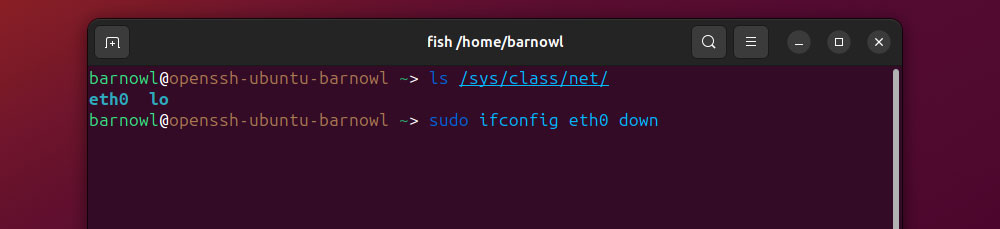
Depending on your location, if you're with the server, you can simply disconnect the ethernet cable to do this. Alternatively, if you're accessing it via SSH, you can use the ifconfig command to disable a specific network interface:
sudo ifconfig <interface_name> down
Be sure to replace '<interface-name>' with that of the specific interface, e.g., 'eth0'. To view a list of all available network interfaces, run:
ls /sys/class/net/
If your server has wireless capabilities, you can block all of these connections with:
sudo rfkill block all
Step 2. Create a Snapshot of All Active Processes
Documenting and logging every aspect of the server is essential for legal compliance and for further investigations to ensure that hacks like these don't happen again.
This documentation could be valuable evidence if any rogue or malicious processes are still running on the compromised server. Save a text file of all active processes with the command:
ps aux > process_snapshot.txt
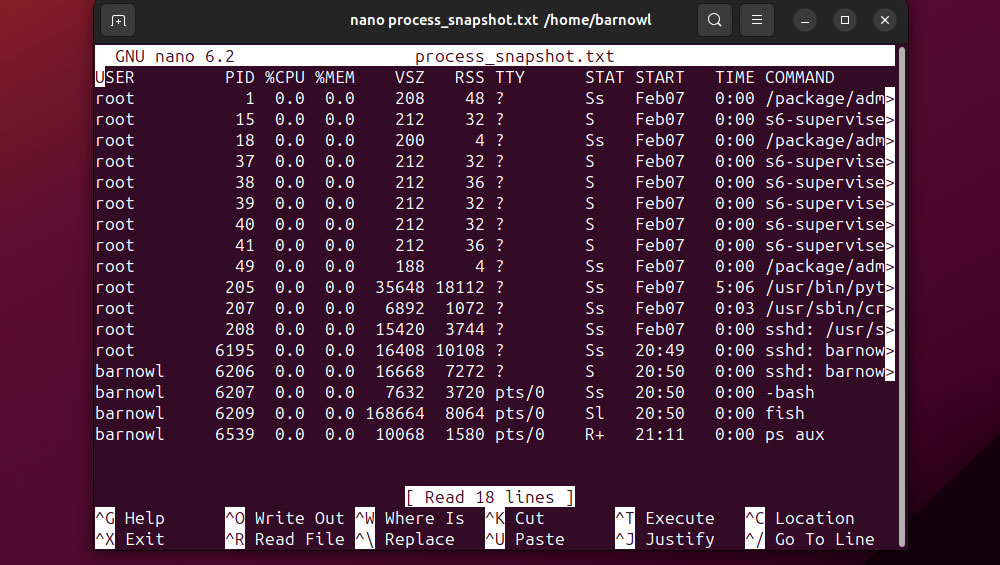
You can view the contents of this file via a text editor like GNU nano or Vim.
Step 3. Make a Secure, Offline Backup of All Server Drives
Logging the currently active processes is an important step in documenting the server hack. Still, cybersecurity experts will require a secure image of your server's disks to conduct a thorough investigation.
The easiest way to provide this is to connect a blank, formatted external drive to the server. Naturally, this drive needs to have a capacity equal to or (better yet) greater than the sum of all the server drive sizes.
First, have your server list all drives and used space by opening Terminal and running:
df -h
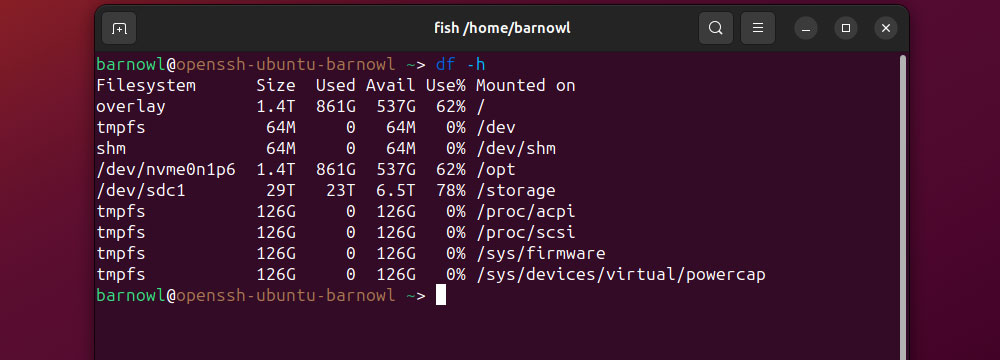
There are many utilities you can use to create copies of the disks. From the command line, 'dd' is usually the simplest. For instance, to copy the contents of /dev/sdc1 to an external drive mounted at /dev/sdb1, run:
sudo dd if=/dev/sdc1 of=/dev/sdb1/server_image.dd bs=4M status=progress
Once the copy process completes, you can ensure the integrity of the disk image for later analysis by generating a cryptographic hash using SHA256 or MD5, e.g.:
md5sum server_image.dd
Make sure to save the hash to the drive, then safely unmount it and store it in a safe place.
Step 4. Call in the Cavalry
If your server has been compromised, seek advice from cybersecurity professionals. This step becomes especially crucial if the server contains information subject to regulations like the GDPR.
Trained cybersecurity professionals can help you properly document the incident and assess the attack vector by analyzing the offline copy of the server drives. This action will improve your protection against an attack the next time it happens.
Step 5. Restore the Linux Server From a Clean Backup
Provided you've been keeping regular backups, you can roll your server back to a point before it was compromised.
This process can be a much quicker way to recover from a breach compared to scouring every port, user, and file on the current server for malware or security flaws.
The specific steps for restoring from a backup will vary based on your server provider and Linux distro. Still, you can reduce the chance of lingering malware by verifying the integrity of your backup and keeping the server isolated from the network during the restoration process, e.g., by booting the server into Recovery Mode.
If your chosen OS uses the GRUB boot loader, you can restore this along with the operating system backup via:
grub-install /dev/sdX
Make sure to replace '/dev/sdX' with the name of the server's boot partition. After restoring the backup, proceed to run a full system update.
Step 6. Scan for Malware
Despite your best efforts to use a clean backup, it's possible that your Linux server may have been compromised for some time. Therefore, your next step should always be to scan your newly restored Linux server for malware using reputable antivirus tools.
ClamAV remains one of the best malware scanners for Linux servers. If you don't already use ClamAV, install it on Ubuntu Server via:
sudo apt-get install clamav
Red Hat users can install ClamAV via:
sudo dnf install clamav
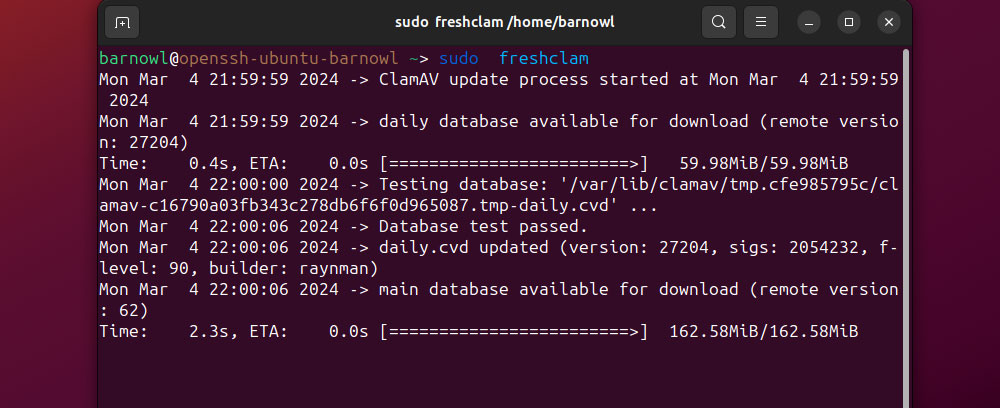
If ClamAV is installed already, make sure to update the virus definitions database via:
sudo freshclam
You can now run a recursive scan for malware and remove any infected files:
sudo clamscan -r --remove /
We also recommended installing and running either 'chkrootkit' or 'rkhunter' to scan for and remove rootkits, as these can reinfect servers that have been restored from a backup.
Step 7. Reset All Credentials
When you restore your server from a backup, this includes login data like usernames and passwords. If this data has been leaked, nothing can stop a hacker from breaching your system again.
You can mandate a password reset for specific user accounts using the 'chage' command by configuring the -d flag (password expiry time) to 0. To do this for user 'barnowl', for instance, just run:
sudo chage -d 0 -M 0 -I -1 -E -1 barnowl
If you have a large number of users on the server, you can use a 'for' loop to iterate a mandatory password change for all accounts:
for username in $(cut -d: -f1 /etc/passwd); do
sudo chage -d 0 -M 0 -I -1 -E -1 $username
done
Make sure also to review current password policies via:
sudo nano /etc/security/pwquality.conf
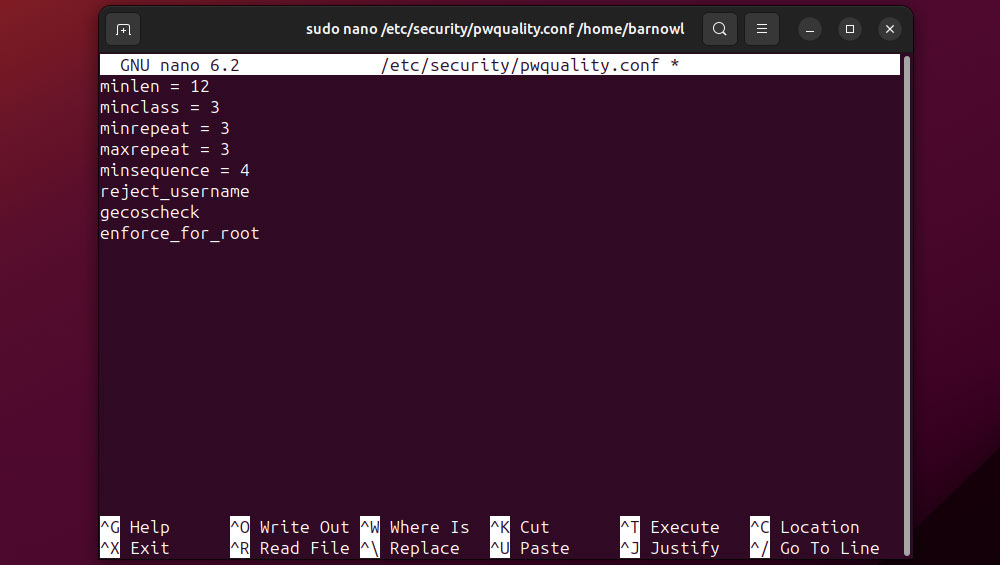
From here, you can mandate password requirements. For example, to specify a minimum password length of 12 characters, add:
minlen = 12
Step 8. Armor Up
After your chosen cybersecurity professionals have completed their analysis, you can determine the attack vector used last time your server was compromised. They can then advise you on further steps to secure your server.
For instance, they may advise you to protect the server against 'brute force' password attacks by installing and configuring 'fail2ban' to detect the IP addresses of multiple failed login attempts and block them accordingly.
Cybersecurity experts might also advise you to implement two-factor authentication (2FA) for users connecting via SSH via common packages like libpam-google-authenticator.
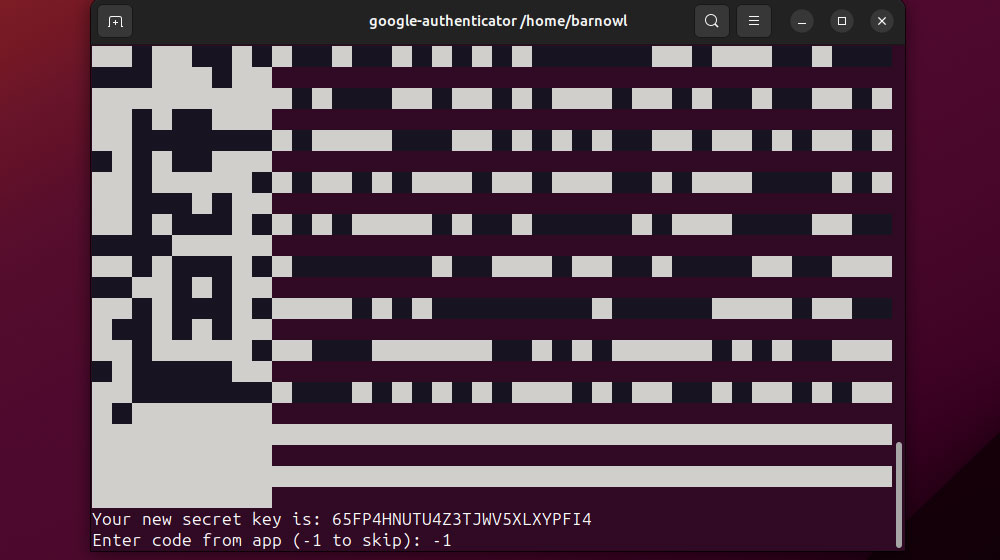
Users will need to run the tool from their own account initially and then generate codes using a dedicated authenticator app.
The server may also need additional security patches and updated configuration files. Follow the advice of your cybersecurity professionals to the letter.
From Recovery to Resilience
When facing the challenges of a compromised server, remember that recovery is just the beginning. By following these steps, you cannot only restore your system's integrity but also fortify your defenses against future threats.
Stay vigilant, keep your security measures up to date, and remember that the cybersecurity landscape is constantly changing. With appropriate precautions and partners, you can successfully secure your Linux server environment.